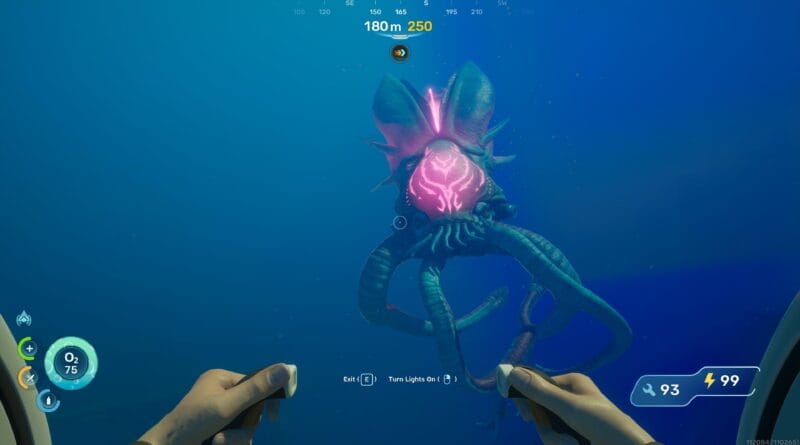
Subnautica 2: All Resources and Where To Find Them — Complete Guide
Subnautica 2: All Resources and Where To Find Them — Complete Guide
Subnautica 2 does not explain its resource system to you very gently. You wake up, you’re underwater, something enormous just swam past your submarine, and now you need to figure out what to actually collect and why. I spent my first couple of hours grabbing everything that looked shiny and useful without really understanding how it all connected — and then I hit a crafting wall that sent me back to square one. This guide is what I wish I had when I started. Every resource in the game, where to find it, what it’s used for, and what order to prioritise it in, so you’re not swimming in circles wondering why you can’t craft the thing you need.
Subnautica 2 splits its resources into several categories — minerals, plant and creature materials, salvage, basic crafted components, electronics, and refined ingots. Some you pick up off the seafloor. Some need tools to harvest. Some you craft from other resources at your base. This guide covers all of them. Let’s start with what you actually need first.
How The Resource System Works
Before diving into the full list,t it’s worth understanding how Subnautica 2 categorises its resources because it affects how you go looking for them. Raw minerals like Titanium, Copper, and Quartz,tz you can collect directly from the environment by hand early on. Organic materials from plants and creatures almost always require the Survival Multitool to harvest — build this as early as possible because, without it, you’ll be locked out of a big chunk of the crafting tree. Then there are processed materials like Glass, Fiber, and Wiring Kits that you don’t find in the world at all — you craft them at your base from raw materials. Understanding which category a resource falls into saves you a lot of time swimming around looking for something that was never going to spawn naturally.
What To Collect First — Early Game Priorities
When you’re just staring out, the temptation is to explore everywhere and grab everything. Resist that. The early game has a clear priority order, and sticking to it makes everything else easier. Focus on Titanium, Copper, and Quartz first — these three cover your basic tools, battery crafting, glass, and base building. Then get your Survival Multitool built as quickly as possible so you can start harvesting organic materials. Once you have those two things sorted,d the rest of the resource tree opens up naturally as you go deeper.
All Minerals and Ores — Locations and Uses
Minerals are the backbone of everything in Subnautica 2. You’ll be collecting these from the very first minute to the very last hour. Here’s every mineral in the game, where to find it, and what it’s used for.
Titanium
The most fundamental resource in the game. You will never stop needing Titanium — it goes into base building, tools, storage, and Titanium Ingots for late-game crafting. Found scattered throughout the world, almost everywhere, and you can also process it from Metal Salvage,e which is worth doing whenever you find any.
Copper
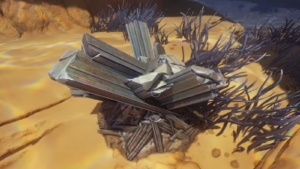
The first resource you genuinely need to hunt down with purpose. Copper clusters appear in cave systems and on cliff walls — look for the orange-tinted rocky outcroppings. Essential for Basic Batteries, Copper Wire, and most early electronics. Find a good cave early and clear it completely.
Quartz
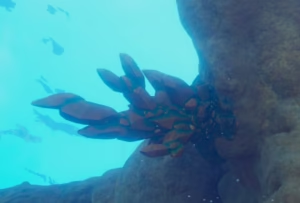
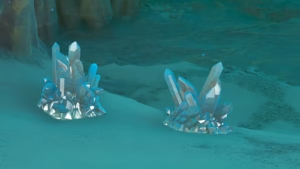
Found around coral and sandy areas in the shallower zones near your starting area. The main use early on is crafting Glass for your Fabricator and Battery Terminal. Not hard to find if you stay near coral formations — look for the pale crystalline growths sitting on the seafloor.
Silver
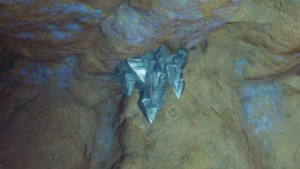
This is when things start getting deeper — literally. Silver clusters appear together in deep cave systems, and you’ll need them for Wiring Kits, Standard Air Tanks, and Silver Ingots. Stock up on oxygen upgrades before you go hunting for it. Found clustered together, so when you find a vein, you’ll get several at once.
Lead
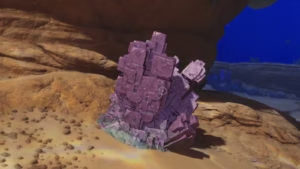
Found deeper still in bare canyon areas. Less flashy than Silver but essential for the Sonic Resonator and Germanium Ingots. The canyons where Lead spawns tend to be emptier and more exposed than the cave systems — keep your eyes on the canyon floor.
Gold
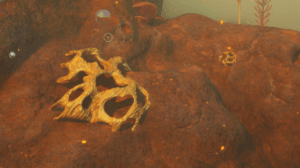
Here’s where things get dangerous. Gold spawns in extremely hot areas, usually near Sulfur deposits. Do not go looking for Gold until you have heat resistance sorted — I tried going in early and immediately regretted it. Once you’re protected,d it’s worth the trip because you need it for the Advanced Wiring Kit and Gold Ingot, ts which unlock a whole new tier of crafting.
Sulfur
Same hot zones as Gold — the two spawn together, so when you go for one, you’ll find the other. Sulfur is used for the Advanced Wiring Kit and Strong Acid. The same rule applies — heat resistance first, then go collect it. Don’t rush this one.
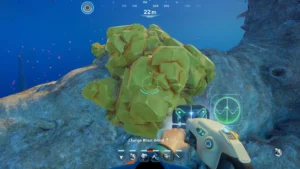
Lithium
Found deep in caves underneath the large coral arches, roughly 500 metres east of the Lifepod. The main use is crafting Plasteel Ingots, which are an in-game necessity. It takes a bit of navigation to reach, but the coral arch formations are distinctive enough that you’ll recognise the area when you get there.
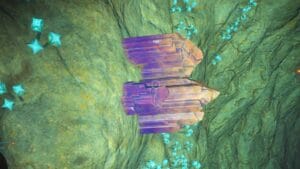
Atacamite
This one is late-game territory. Atacamite appears around the far-east alien structures sitting on the seabed. Used for Mangalloy Ingots and the Ultra High Capacity Air Tank. By the time you’re in the alien structure zones, you’ll have enough range and equipment to collect it properly.
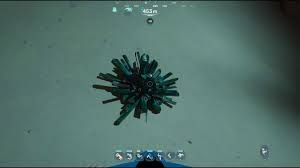
Celestine
Found around the alien power plant, the alien observatory, and the Metal Farm area. Refined into Strontium and used for advanced alien-structure crafting. If you’re deep enough into the game to be visiting these locations, you already know what you’re doing — grab Celestine whenever you see it in these zones.
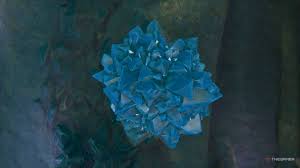
Conduit Crystal
One of the rarer and more valuable late-game minerals. Found near the far-east alien power plant, specifically. Used for the Advanced Battery, Entangled Power Cell, and Feedback Resonator — all of which are serious upgrades. This is a targeted trip rather than something you’ll stumble across naturally.
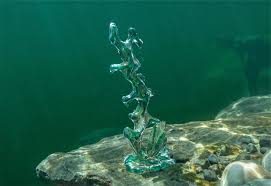
Mineralized Clinker and Troilite
These two go together. Mineralized Clinker is found in the Metal Farm area in the far northeast — but you can’t collect it directly. You need to destroy it with the Sonic Resonator to get Troilite out of it. Troilite then goes into Mangalloy Ingots and the Entangled Power Cell. Get your Sonic Resonator built before making this trip.
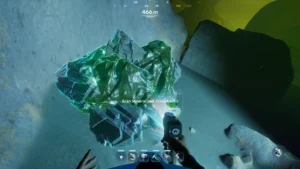
All Plant, Coral, and Creature Resources
This entire category requires the Survival Multitool. Build it early, keep it on you, and you’ll have access to all of these. Most organic resources regrow over time, so farming spots you’ve cleared are worth revisiting.
Acidic Raion Pouch
Harvested from the purple and green Raion plants, you’ll start seeing almost immediately. One of the first organic resources you should collect — used for Basic Batteries and Mild Acid. The Raion plants are hard to miss once you know what you’re looking for.
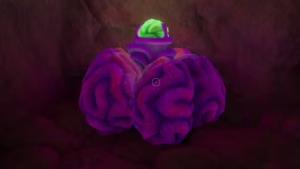
Medical Gel Sac
Also harvested from purple and green Raion plants using the Survival Multitool. Used for healing recipes. Worth keeping a good supply of these at all times — the ocean has opinions about your health, and they are not friendly.
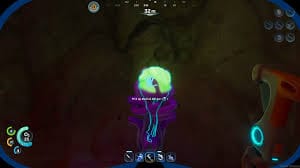
Fibrous Pulp
Slash certain plants with the Survival Multitool to get this. Used for Fiber, Fiber Mesh, and Biofuel Blocks. Common enough that you’ll collect plenty just moving through the world naturally.
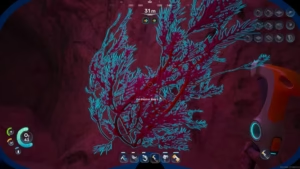
Lucifer Rotsac
Look for plants with glowing orange pentagons — those are Lucifer Rotsac plants, and they’re genuinely one of the most useful organic resources in the early game. Used for Rubber, Grease, and Glowsticks. The good news is they regrow over time,e so find a cluster near your base and keep coming back.
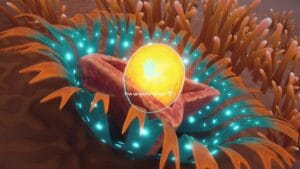
Necrolei Cyst
Found in the blue and purple coral area roughly 350 metres north of the Lifepod. Used for Strong Ac ID, an ID that you’ll need for a lot of mid-game crafting. The blue and purple coral zone is visually distinctive — you’ll know you’re in the right area.
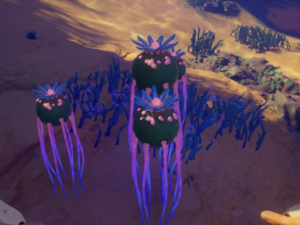
Coral Shavings
Slash certain coral with the Survival Multitool. Used for Coral Jar and Coral Mash recipes. Decorative and functional — easy to collect in large quantities if you ever need them.
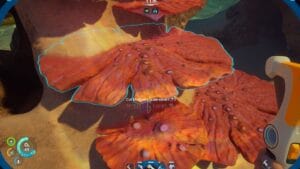
Axum Bacterial Culture
Found in yellow pools near the Metal Farm in the far northeast. Late game resource for the Metal Farm system. You’ll find this naturally when you reach that area.
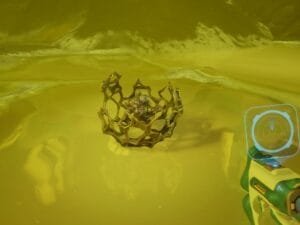
Creature Enamel
Found around the far-east alien power plant. Used for crafting Enameled Glass, which is a mid-to-late game material. Same trip as Conduit Crysta,l so grab both when you make the journey out there.
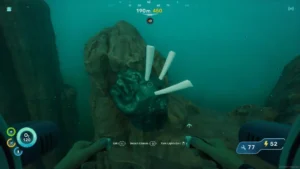
Salvage Resources
Salvage comes from wrecks and abandoned structures rather than natural deposits. The most important one early on is Metal Salvage because it converts directly into Titanium — always worth grabbing whenever you come across it.
Metal Salvage
Found near the wreck of the CICADA starship. Process it into Titanium or Salvaged Titanium. Whenever you’re near a wreck site, check the surrounding area for Metal Salvage — it adds up quickly, and Titanium is always needed.
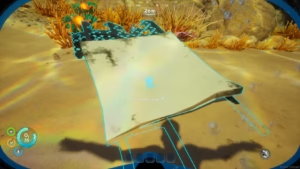
Axum Resonator
Found as a salvage item in alien and Axum-related areas. Late-game salvage is worth picking up when you encounter it.
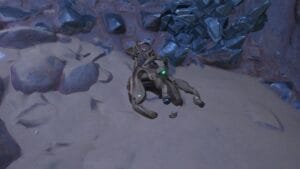
Basic Crafted Materials — What To Make At Your Base
These resources don’t exist in the world — you make them at your base from raw materials. Here’s the full list of what to craft and what you need.
| Material | Recipe |
|---|---|
| Glass | 2x Quartz |
| Enameled Glass | 1x Glass + 1x Creature Enamel |
| Fiber | 2x Fibrous Pulp |
| Fiber Mesh | 2x Fiber + 1x Strong Acid |
| Rubber | 2x Lucifer Rotsac |
| Grease | 1x Lucifer Rotsac |
| Mild Acid | 2x Acidic Raion Pouch + 1x Copper |
| Strong Acid | 2x Necrolei Cyst OR 1x Sulfur + 1x Gold |
| Salvaged Titanium | 1x Metal Salvage |
Electronics and Advanced Components
Electronics are where all the early gathering starts paying off. Every significant upgrade and tool in the mid-to-late game runs through this crafting tier. Here’s what you’re building and what goes into each one.
| Component | Recipe |
|---|---|
| Basic Battery | 2x Copper + 1x Acidic Raion Pouch |
| Advanced Battery | 1x Conduit Crystal + 1x Strong Acid + 1x Silver Ingot |
| Copper Wire | 2x Copper |
| Power Cell | 2x Basic Battery + 1x Strong Acid + 1x Salt |
| Entangled Power Cell | 1x Conduit Crystal + 1x Strong Acid + 1x Gold Ingot + 1x Troilite |
| Wiring Kit | 1x Silver + 1x Copper Wire |
| Advanced Wiring Kit | 1x Wiring Kit + 1x Gold + 1x Sulfur |
| System Chip | 1x Wiring Kit + 2x Quartz |
| Dedicated Core | 1x Advanced Wiring Kit + 2x Quartz + 1x Strong Acid |
Ingots and Refined Materials
Ingots are what you process raw minerals into for late-game crafting. Every ingot requires three of its base minerals,s except the specialist ones. Build your Processor and start refining as soon as you have the raw materials to spare.
| Ingot | Recipe |
|---|---|
| Titanium Ingot | 3x Titanium |
| Copper Ingot | 3x Copper |
| Silver Ingot | 3x Silver |
| Gold Ingot | 3x Gold |
| Germanium Ingot | 2x Silver OR 2x Lead |
| Plasteel Ingot | 2x Titanium + 1x Lithium |
| Mangalloy Ingot | 1x Titanium Ingot + 1x Atacamite + 1x Troilite |
| Strontium | 2x Celestine |
Best Resource Farming Route — What To Do In Order
After a lot of time in that, I’m figuring this out the hard way. Here’s the order that actually makes sense. Follow this, and you won’t hit the crafting walls that stopped me cold in my early sessions.
Step 1 — Clear the Lifepod area first. Titanium, Copper, and Quartz are all nearby. Get your basic tools, first battery, and glass sorted before you go anywhere else.
Step 2 — Build the Survival Multitool immediately. As soon as you have the materials. The entire organic resource tree is locked without it,t and you need those materials for batteries and progression.
Step 3 — Harvest Raion plants and Lucifer Rotsac near your base. Get your Basic Batteries and Rubber crafted. These feed into almost everything you need in the first few hours.
Step 4 — Go deep for Silver and Lead. Head into the deeper cave systems for Silver — you need Wiring Kits to progress. Pick up Lead at the same time for the Sonic Resonator.
Step 5 — Build the Sonic Resonator. Once you have it, go back through areas you’ve already explored and break the large resource nodes you couldn’t collect before. Massively increases your haul.
Step 6 — Gear up for heat before going for Gold and Sulfur. Get heat resistance sorted first. Then hit the hot zones together since Gold and Sulfur spawn in the same areas.
Step 7 — Push into the late game zones. Lithium, Atacamite, Celestine, Conduit Crystal, and Troilite all come from the deeper, more dangerous areas. Only head here once you have proper oxygen upgrades, heat resistance, and enough storage to make the trip worthwhile.
Final Tips Before You Dive
A few things I learned that aren’t obvious from the resource list alone. First — organic resources regrow over time, so mark your best plant farming spots and come back regularly rather than exhausting one area and moving on. Second — always process Metal Salvage into Titanium when you find it. Titanium demand never actually stops. Third — the Sonic Resonator changes everything, prioritise getting it built over almost any other tool in the mid-game. And fourth — the alien structure areas in the far east are genuinely dangerous. Don’t go there underprepared just to chase rare minerals. The ocean will remind you who’s actually in charge.
Also check out this cool map, it shows all the locations for everything you’ll ever need
https://interactivemap.app/subnautica-2/maps/proteus
We’ll be covering every new update on kickofdraft.com as it drops — release date, new trailers, gameplay details.
Bookmark this page and check back.

Hello! I am Mr. Sano Ethan, a content creator, variety gamer, and the driving force behind Kick Of Draft. With over 6 years of hands-on experience across PC, console, and indie gaming,
Pingback: Subnautica 2 Guide: All Confirmed Leviathans - Kick Of Draft
Pingback: Subnautica 2 dev apologises for telling combat-seeking players to "go play Sons of the Forest or something" - Kick Of Draft