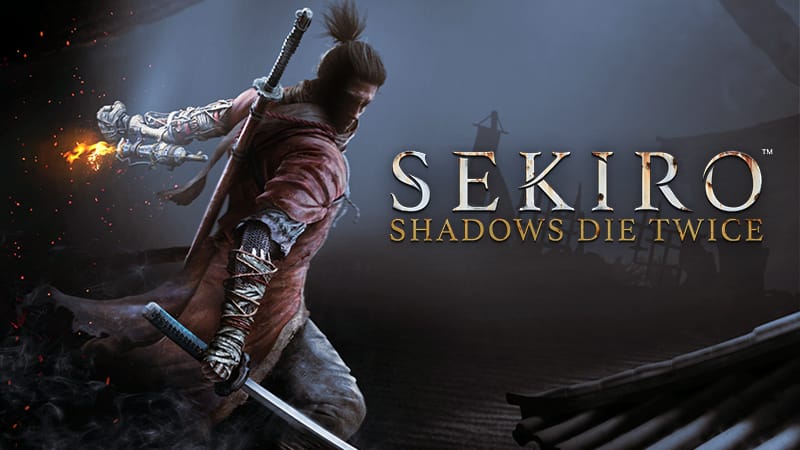
Sekiro Shadows Die Twice: The Ultimate Guide for the Hardest Bosses
Sekiro Bosses In Order
Guides
Sekiro: Shadows Die Twice doesn’t hold your hand. There’s no summon system, no easy mode, and no way to grind your way past a boss you haven’t learned yet. I spent three full evenings on Genichiro Ashina alone before it clicked — and when it did, I finally understood what this game was actually asking of me. This guide covers the hardest bosses in the game in the order you’ll typically face them, with the key attack patterns you need to learn and the mistakes that will get you killed every time.
Sekiro broke me in the best possible way. I came into it off the back of Dark Souls 3, thinking I understood FromSoftware’s language — learn the pattern, find the window, punish carefully, repeat. That approach got me killed so many times in Sekiro’s opening hours that I genuinely considered uninstalling it. The game isn’t asking you to be patient in the Dark Souls sense. It’s asking you to be present. To actually watch what’s happening in front of you, read it in real time, and respond with precision rather than caution. Once I understood that difference — really understood it, not just intellectually but in my hands — Sekiro became one of the most satisfying games I have ever played on PC.
This guide covers the hardest bosses in the game in roughly the order you’ll face them. For each one,e I’ll tell you the attack that was killing me most, the mistake I kept making, and the thing that finally made the fight click. Spoiler warning from here — we’re going deep into boss territory.
Just an obligatory spoiler warning before we delve further in – we will cover the main bosses, talking about their motives, place in the story, and a potential strategy to use against them. If you do not want any of this spoiled for you, you have been warned.
#1 Gyoubu Masataka Oniwa
Better known by the players of Sekiro as the annoying horse guy and the first real obstacle in the game, Gyoubu is one of Genichiro’s most trusted retainers. He used to be a powerful bandit leader, but once this path crossed and he was defeated by Isshin, head of the Ashina family, he became part of their army.
The spear he wields can be seen in the opening cutscene, where Isshin is the one who beats the huge samurai, gifting his spear he gifts to Gyoubu, after his own horn-spear broke in battle. He is believed to be based on several real historical figures from the Japanese Sengoku period.
When it comes to fighting him, Genichiro is the game’s real tutorial, and it’s brutal about it. You meet him before you’re ready, you lose, and then the rest of the early game is the process of becoming someone who can beat him. When I finally came back to that rooftop fight,t I was genuinely nervous in a way that games rarely make me feel anymore. He has three phases, each one adding new pressure, and the third phase arrow attacks caught me completely off guard the first time and killed me immediately after I thought I’d won.
The thing that changed everything for me was stopping trying to create distance. Every instinct tells you to back off and recover when you’re low on health. Genichir punishes him harder than he punishes aggression. Stay close, deflect rather than dodge, and keep the pressure on his posture bar. The moment I committed to that approach,h the fight went from impossible to manageable in the space of two attempts.
Key attack to learn: The Ashina Cross — long wind-up, easy to read, massive posture damage if you deflect it perfectly instead of dodging away.
Biggest mistake: Creating distance when you’re scared. It resets his posture and gives him space to use ranged attacks.
#2 Lady Butterfly
Lady Butterfly is where a lot of players quit, and I completely understand why. She’s fast, her illusion phase in the second half is chaotic and visually overwhelming, and she punishes the deflect timing window more strictly than almost any other boss in the game. I spent more time on her than on Genichiro despite facing her first, purely because I hadn’t fully committed to the deflect system yet. She forces the issue.
The illusion phase is the real test. Ghostly soldiers spawn and attack from multiple directions while Lady Butterfly is throwing projectiles from above. The instinct is to deal with the soldiers first — ignore it. Chase her, stay aggressive, keep landing hits. The soldiers disappear if she takes enough damage quickly enough. The moment I stopped treating the illusion phase as crowd control and started treating it as a race, I cleared it.
Key attack to learn: Her aerial dive — she jumps high and comes straight down. Jump and kick off her mid-air for a free posture hit.
Biggest mistake: Wasting the illusion phase killing soldiers instead of attacking her directly.
Lady Butterfly is not that difficult, though she can be overwhelming when you first meet her. Remember to deflect, and also to dodge and hit. It is important to use shuriken every time she is in the air to bring her down and score a hit or two. In the second phase, make sure to bring some snap seeds to dispel the illusion; otherwise, you’d have to kill them. Rinse and repeat the way you fought in the first part, and you should be fine.
#3 Genichiro Ashina
Genichiro, the man who cuts off your arm at the very beginning of the game, is probably the last hope of the Ashina clan – even though he was merely adopted into it after the death of his mother, who was a peasant woman. He became one of the best swordsmen in the clan and eventually one of the most powerful people in it.
He is also the only known student of Tomoe, a mysterious person (or a clan) that seems to have harnessed the power of lightning and passed it on to their only known student. The location of their training was probably somewhere in the vicinity of the Fountainhead Palace, the celestial place where the fish-like Palace Nobles abide.
This fight has two phases. In the first phase, sidestep if he comes at you firing arrows and attack immediately. If you try to heal, he will send arrows at you, so beware. Stay close to him when he is down to one health bar to avoid the barrage of arrows. In the second phase, he will try to use the lightning on you, but if you press attack in the air when he sends it at you, you will send it back for some satisfyingly large damage.
#4 Folding Screen Monkeys
The four monkeys are based on the Buddhist or Confucian idea of the Three Wise Monkeys, which can be seen often represented as covering their eyes (see no evil), ears (hear no evil), and mouth (speak no evil). The fourth one is also sometimes added (do no evil).
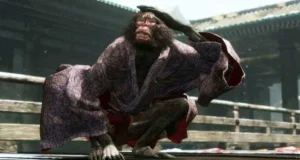
The monkeys that appear in the Hall of Illusions are there to stop you from gaining access to Inner Sanctum and finding the Divine Child. They are not really a boss as such; it is more of a game of hide & seek between them and you.
The best way to go about it is by being stealthy and using Shinobi Firecracker once close to them. Get the invisible monkey first (he’s right behind you as you start the fight), and you should be fine. If the monkeys manage to disappear, you can either hang around in cover waiting for them to come back or return to the initial area with the folding screens and reset their positions (those you killed already will stay dead).
#5 Corrupted Monk Illusion/Corrupted Monk
The first time you meet the Corrupted Monk at the end of Mibu Village, it will be just an illusion, trying to stop you from entering the Wedding Cave Door. Be aware – illusions can kill just as well.

For this first meeting, which requires only one Deathblow, be sure to learn the patterns first. They are quite slow and deliberate, but also deadly. The five-spin Whirlwind attack is probably the most difficult, as you won’t be able to deflect it all the way. The key is to disrupt her patterns with Shinobi Firecracker. Perhaps add some Divine Confetti for good measure, as this is an apparition-type enemy.
The second time you meet this boss, it will be the real deal, three-course Deathblow. In the first phase, build up posture by deflecting, keeping an eye out for perilous attacks. The second phase is still a posture-building battle, but there will be shadow versions of the Monk – the best way to deal with them is to ignore them and swing around until the physical form makes its return.
The third phase mixes things up completely. Along with the attacks that might be familiar, there will be new things that include the Terror Spew, which you need to avoid, or the fight will be made fairly short. However, having paid attention to the repertoire earlier, you should be able to bring this fight to an end without much trouble.
#6 Guardian Ape
The Great Guardian Ape can be found in Bodhisattva Valley, jealously guarding the entrance to Lotus of the Palace, a rare flower that the ape was hoping would attract another mate (you can find the skeleton of the ape’s previous mate in one of the caves nearby). Unfortunately for both of you, you also require the flower.
After defeating the ape, one of the items received is the Slender Finger, which you can use to upgrade your shinobi tools. The Sculptor will tell you about who the finger belonged to, his fellow Shinobi, called Kingfisher. They trained together in the Sunken Valley a long time ago, and the mystery remains regarding how her finger ended up inside the ape’s belly.

The Guardian Ape is the moment Sekiro reveals its sense of humour, and by humour,r I mean it will make you feel like an idiot in ways you didn’t think a video game could. I won’t spoil the specific moment — if you haven’t reached it yet, you’ll know exactly what I mean when you get there. What I will say is that I genuinely said something out loud to nobody when it happened, and it wasn’t polite.
Phase one is about learning not to be disgusted by the fight and just play it cleanly — stay close to his body, away from the legs, and don’t panic when he throws his own head at you. Phase two requires a complete mental reset. New moveset, new threat level, new patience required. The Mortal Draw skill makes phase two dramatically easier if you have it unlocked. If you don’t, prioritise it before coming back.
Key attack to learn: The screaming grab in phase two — there’s a distinct sound cue before it. Learn that sound and dodge sideways the moment you hear it.
Biggest mistake: Playing phase two the same way as phase one. They are completely different fights.
#7 Great Shinobi Owl/Owl (Father)
The man who found Sekiro as a kid in the middle of the battlefield and taught him everything about being a shinobi, the Great Shinobi Owl, is a boss that can be avoided (read more about it in our Sekiro endings guide). However, it is a tough-as-nails boss that will make short work of you until you have mastered the moveset.
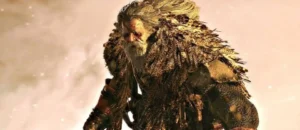
The fight in the Ashina Castle that happens if you remain loyal to Kuro will see the Owl using all manner of shinobi techniques. Your best bet in the first phase is to bait him into attacking and get in your hits where possible. Mortal Blade is your friend here. In the second phase, getting him into a corner and being very aggressive and ready to parry and dodge the green smoke seems like the best strategy.
The other situation where you can fight him is optional and happens after you defeat him the first time (and obtain the Father’s Bell Charm following that). You get the chance to fight the Owl in his prime, back in time, in the Hirata Estate. He is an even more accomplished fighter here, faster and stronger; however, he doesn’t use the poison and health block attacks as in the other fight. Cornering him usually still helps to wear him down.
In the second phase, run when he’s invisible, use Mikiri against his Shadowrush, and you should be fine, as he’s mostly defensive here.
#8 Isshin Ashina
Isshin is the best boss FromSoftware has ever made, and I will die on that hill. Three phases, each one completely distinct, each one demanding everything you’ve learned across the entire game. When I finally reached him after the Owl Father fight,ght I was already tired and emotionally drained from everything that had come before. He destroyed me for two full evenings. I’m not exaggerating — I attempted him probably sixty times across those two sessions.
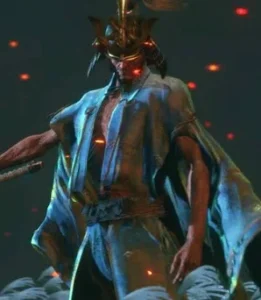
The first phase is a pure sword fight, and it’s the most elegant thing in the game. Second phase adds a spear and lightning that you can deflect back at him — learning that mechanic is the single biggest damage opportunity in the fight. The third phase adds the gun and requires you to play almost perfectly while managing your resources. When I finally beat him on PC, I didn’t celebrate immediately. I just sat there for a moment. Then I went and made a cup of tea because I didn’t know what else to do with myself.
Key attack to learn: The lightning reversal in phase two. Jump when he charges lightning and hit attack at the peak of your jump to send it back. It does massive posture damage and turns the tide of the phase.
Biggest mistake: Treating phase three as a separate fight. It’s a continuation — stay calm, keep the rhythm you’ve built, don’t panic.
Sekiro Bosses Are Awesome
Sekiro’s bosses are brutal by design, but none of them are unfair. Every attack has a tell. Every pattern can be learned. The game punishes aggression without discipline and rewards players who are willing to slow down, watch, and react. If you’re stuck on any of the fights above, the answer is rarely “get better gear” — it’s to stand still, watch the animation, and trust the deflect. Once that mindset clicks, Sekiro becomes one of the most satisfying action games ever made.
We’ll be covering every new update on kickofdraft.com as it drops — release date, new trailers, gameplay details, indie hits
Bookmark this page and check back.
Source: Steam

Hello! I am Mr. Sano Ethan, a content creator, variety gamer, and the driving force behind Kick Of Draft. With over 6 years of hands-on experience across PC, console, and indie gaming,
Submit your review | |
Pingback: Saros Review: Housemarque Did It Again And I Am Not Okay - Kick Of Draft
Pingback: Mina the Hollower Review: Yacht Club Games Did It Again And Nobody Is Talking About It Enough - Kick Of Draft